My Jaw-Dropping Pantry Makeover: From Cluttered to Chic!

When I first laid eyes on my pantry, I knew it had potential, but the cluttered shelves and dated appearance were far from the stylish, functional space I envisioned.

Armed with a clear plan and a touch of creativity, I embarked on a pantry transformation journey that completely changed the way I cook, entertain, and enjoy my home. I’m thrilled to share the details of my pantry makeover with you, including the key changes I made, the products I used, and the lessons I learned along the way.

Chapter 1: Assessing the Space and Creating a Plan 📏
Before diving into the makeover, I took stock of my pantry’s strengths and weaknesses. I loved the generous size and the potential for custom storage, but the dated linoleum floor, insufficient lighting, and lack of organization were holding me back. I created a detailed plan that addressed these key issues and established a clear vision for the space.
Products Used:
- Measuring tape
- Notepad and pen
Lessons Learned:
- If you assess correctly, you may find that a total overhaul is not necessary; it’s about working with what you have!
Chapter 2: Laying the Foundation: Flooring and Lighting 🛠️
To set the stage for my pantry transformation, I started with the flooring. I chose a stunning black and white diamond pattern vinyl flooring for its durability, easy maintenance, and timeless appeal. The installation process took about 4 hours and the flooring cost around $200.

Next, I tackled the lighting. The original pantry had a single, dim overhead light that left many shelves in shadow. I opted for a combination of recessed LED lights and over-shelf strip lights to brighten every corner and create a welcoming ambiance. The lighting upgrade took 3 hours to install and cost approximately $150.
Cost Breakdown:
- Vinyl Flooring: $200
- Recessed LED Lights: $110
- Over-shelf Strip Lights: $40
Total for Chapter 2: $350
Products Used:
- Black and white diamond vinyl flooring
- Recessed LED lights
- Over-shelf strip lights
Lessons Learned:
- Sometimes, it’s better to keep your original floor; you can avoid unnecessary and expensive work while still achieving a beautiful outcome.
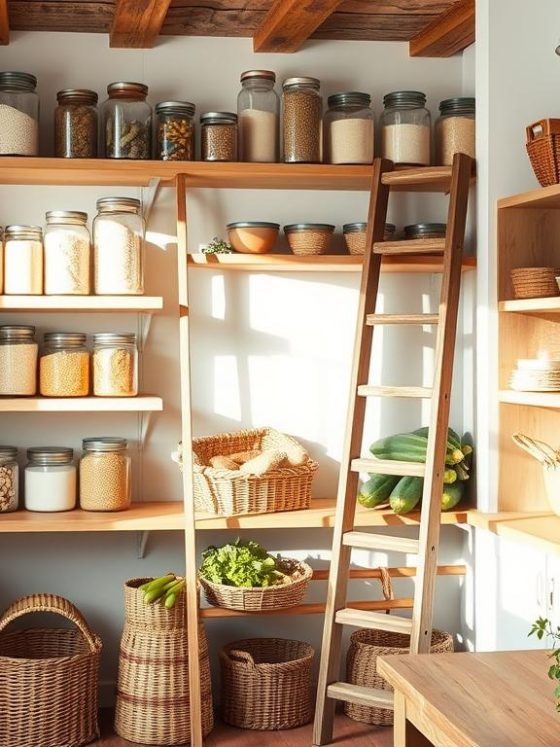
Chapter 3: Choosing the Perfect Organization System 📦
With the foundation in place, it was time to plan my organization system. I opted for a mix of open shelving and clear bins to maximize storage and accessibility. I measured the space carefully and chose shelving in a crisp white finish to complement the flooring. The cost for the organization system was around $450, and the installation took 5 hours.
Cost Breakdown:
- Open Shelving Units: $450
Total : $450
Products Used:
- Open shelving units
Lessons Learned:
- The space totally transformed how I felt going in! It became my happy place. 😊
Chapter 4: Styling and Stocking the Pantry 🎨
To add a touch of personality and flair to my pantry, I incorporated elements of pink throughout the space. I chose clear bins with pink labels, woven baskets with pink trim, and even found some pink-packaged pantry staples to add a pop of color. I decanted dry goods into matching glass jars with custom labels and used turntables to make hard-to-reach items more accessible.

I also prioritized visibility and function when stocking the pantry. I grouped items by category and used shelf risers to maximize vertical space. The total cost for the bins, jars, and other styling elements was approximately $450.
Total : $450
Products Used:
- Clear bins with pink labels
- Woven baskets with pink trim
- Glass jars with custom labels
- Shelf risers and turntables
Lessons Learned:
- Personalizing your space makes it more enjoyable, and using clear bins enhances visibility and accessibility.
Chapter 5: The Big Reveal and Final Thoughts 🎉
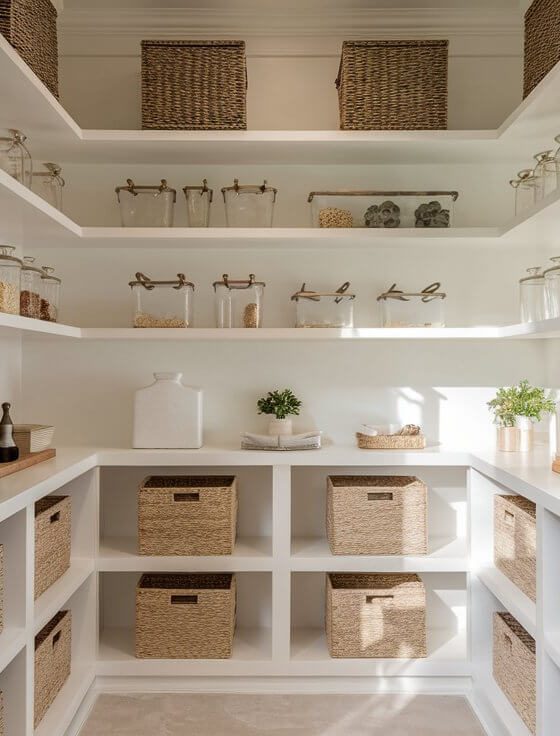
After 4 weeks of planning and execution, my pantry makeover was finally complete. The transformation was even more stunning than I had imagined. The new flooring and lighting set the stage for a bright, inviting space, while the organization system and styling elements made the pantry both functional and beautiful.


The total cost for the entire makeover was around $1250, and the project took approximately 15 hours from start to finish. While it was a significant investment of time and resources, the impact on my daily life has been incredible. I now have a pantry that makes meal planning, grocery shopping, and cooking a breeze and brings a smile to my face every time I open the door. 😊
Overall Total Estimated Cost: $1,250
Products Used:
- All products from previous chapters
Lessons Learned:
- The effort and investment are worth it; a well-designed pantry can transform your cooking experience and bring joy to your daily routines.
If you’re considering a pantry makeover of your own, I highly recommend starting with a clear plan and vision. Invest in quality organization systems and don’t be afraid to infuse your personal style into the space. With a little creativity and elbow grease, you too can transform your pantry into a functional and fabulous space that you’ll love for years to come. 💖
You Might Also Like

What Millionaires Want in their Kitchens

The 3 Secrets to Kitchen lighting